How to Make Perfect Mummy Cookies Fast
If you’re looking to impress your guests with something spooky, fun, and absolutely delicious, these Mummy Cookies are just the treat you need. Perfectly baked with a crispy exterior and soft center, these Halloween-inspired cookies combine simple ingredients with easy decorating techniques to create a festive favorite that’s as quick to make as it is delightful to eat. Whether you’re whipping up snacks for a party or surprising your family with a seasonal treat, learning to bake Mummy Cookies quickly with straightforward steps gives you a reliable go-to recipe that will satisfy sweet cravings and spark smiles.
Why You’ll Love This Recipe
- Quick and Easy: The recipe uses simple steps so you can bake Mummy Cookies fast, even on a busy day.
- Kid-Friendly Fun: Decorating the cookies is enjoyable for all ages and encourages creativity.
- Perfect Halloween Vibes: The spooky design is festive without being scary, making it great for all audiences.
- Delicious Flavor: The blend of classic cookie ingredients ensures these taste as good as they look.
- Versatile Ingredients: Uses pantry staples that you probably already have on hand.
Ingredients You’ll Need
Each ingredient in this Mummy Cookies recipe plays a pivotal role—from texture to flavor to appearance. Keeping the ingredients simple means you can mix them quickly and get baking with confidence.
- Butter: Melted butter adds richness and helps create a soft yet crispy cookie base.
- Sugar: Granulated sugar sweetens the dough and contributes to that satisfying crunch.
- Egg: Acts as a binder that holds the ingredients together and adds moisture.
- Vanilla Extract: Adds a warm, inviting aroma that enhances the cookie flavor.
- Flour: The foundation of the dough, providing structure and softness once baked.
- Baking Powder: Gives a slight lift to ensure the cookies aren’t too dense.
- Semi-Sweet Chocolate Chips: Perfect for the “mummy eyes” that make the cookies visually spooky and fun.
- White Chocolate or Royal Icing: Used to create the mummy’s bandages by piping on the cookie surface.
Variations for Mummy Cookies
This Mummy Cookies recipe is wonderfully flexible, allowing you to swap or add ingredients based on your preferences or what you have available. Feel free to customize and experiment to make your version uniquely yours.
- Gluten-Free Option: Substitute all-purpose flour with a gluten-free blend for allergy-friendly treats.
- Healthy Swap: Use coconut sugar instead of granulated sugar for a natural alternative.
- Nutty Twist: Add finely chopped nuts like pecans or almonds into the dough for extra texture.
- White Chocolate Eyes: Switch up the semi-sweet chips for white chocolate chips for a lighter look.
- Vegan Version: Replace butter with coconut oil and use flax eggs to keep it plant-based.

How to Make Mummy Cookies
Step 1: Prepare Your Dough
Start by creaming together softened butter and sugar until fluffy. Beat in the egg and vanilla extract until combined. In a separate bowl, whisk flour and baking powder, then gradually add to the wet ingredients until a smooth, pliable dough forms.
Step 2: Shape and Bake the Cookies
Preheat your oven to 350°F (175°C). Scoop dough onto a parchment-lined baking sheet, shaping each mound into an oval to mimic a mummy’s body. Bake for 10-12 minutes, or until edges begin to turn golden. Let cookies cool completely before decorating.
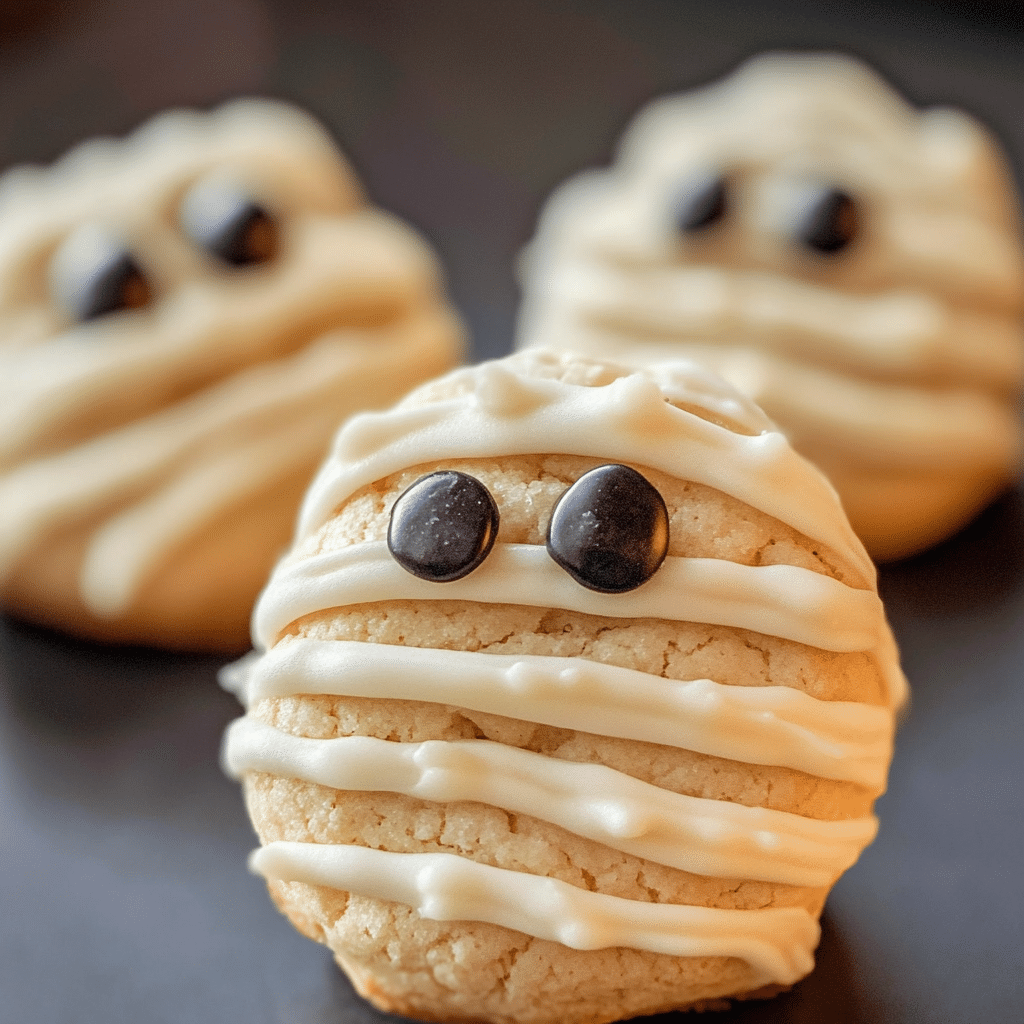
Step 3: Create the Mummy Wrapping
Using melted white chocolate or royal icing, pipe zigzag lines over the cooled cookies to create the mummy’s bandages. Don’t worry about perfect lines—the messy effect adds character!
Step 4: Add the Eyes
Place two semi-sweet chocolate chips near the top center of each cookie while the icing or white chocolate is still wet so they stick, forming the mummy’s spooky eyes.
Pro Tips for Making Mummy Cookies
- Chill Dough: Refrigerate the dough for 15-20 minutes to prevent spreading during baking.
- Use Piping Bags: For cleaner mummy bands, use a piping bag or a plastic bag with a tiny cut at the corner.
- Don’t Overbake: Remove cookies as soon as edges turn lightly golden for soft, tender centers.
- Decorate Once Cool: Completely cooling the cookies helps the icing or white chocolate set without melting.
- Practice the Bandages: Try piping on parchment paper before decorating your cookies to perfect your technique.
How to Serve Mummy Cookies
Garnishes
Sprinkle crushed candy corn, edible glitter, or colored sugar around the cookies for an extra festive touch that complements the spooky design and adds a pop of color.
Side Dishes
Serve these Mummy Cookies alongside classic Halloween treats like caramel apples or pumpkin spice latte for a cohesive and festive snack table.
Creative Ways to Present
Arrange your Mummy Cookies on a black or orange platter lined with faux spiderwebs or shredded tissue paper to amp up the Halloween vibes and make the treats irresistible.
Make Ahead and Storage
Storing Leftovers
Store your Mummy Cookies in an airtight container at room temperature for up to 4 days to maintain freshness and texture.
Freezing
Freeze undecorated cookies in a single layer on a baking sheet, then transfer to a resealable bag for up to 3 months; decorate after thawing for best results.
Reheating
Warm cookies for 10-15 seconds in the microwave to refresh softness, but avoid heating decorated cookies too long to prevent melting the icing or chocolate eyes.
FAQs
Can I use store-bought cookie dough for Mummy Cookies?
Yes! Store-bought dough can be shaped and decorated as mummy cookies, which is a great shortcut if you’re short on time.
What if I don’t have white chocolate for the bandages?
You can easily substitute royal icing or even white frosting if preferred, just make sure it’s thick enough to hold its shape when piped.
How do I make Mummy Cookies vegan?
Use dairy-free butter or coconut oil, replace eggs with flax or chia seed egg substitutes, and choose vegan chocolate chips for the eyes.
Can I add food coloring to the mummy bandages?
Absolutely! Adding a few drops of food coloring to your white chocolate or icing lets you customize colors for a unique, festive look.
What is the best way to pipe the mummy bands?
Use a piping bag with a small round tip, and don’t worry about making perfect lines—the ragged, crisscross pattern adds authenticity to your mummies.
Final Thoughts
These Mummy Cookies combine simplicity, fun, and flavor to create a wonderful Halloween treat everyone will adore. Once you try your hand at this recipe, you’ll see just how fast and rewarding it is to whip up these spooky delights. So grab your ingredients, roll up those sleeves, and enjoy baking a batch of Mummy Cookies that will glow with festive spirit and sweetness.